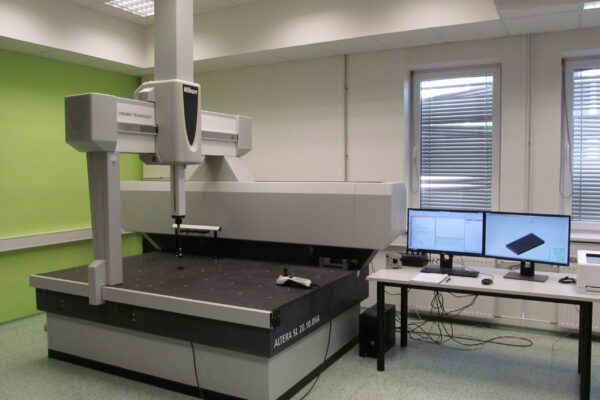
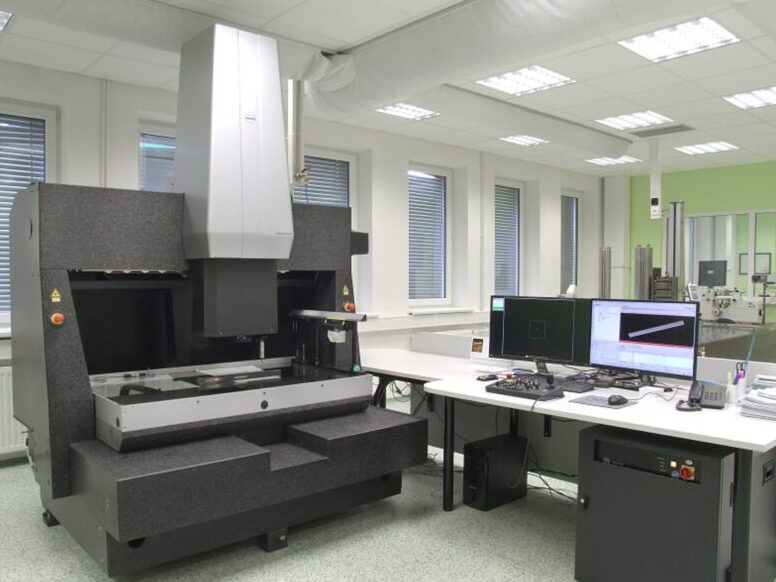
Our calibration laboratory performs custom measurements on 3D measuring machines, i.e. all dimensional inspection, including the evaluation of shape and position deviations. This is done both according to technical drawings and 3D CAD models in igs or step formats.
Custom measurements
3D measuring machine – NIKON Altera SL 20.10.8 HA
- Measurement range: 2 000×1 000×800 mm
Multisensor 3D measuring machine – WERTH Video-Check-HA
- Range: 1 000x650x400 mm
- Option of touch and optical measurement
Both machines are designed for measurement with increased accuracy, in the order of 10-3 mm and 10-4 mm in the case of optical measurement. The machines are equipped with air vibration dampers to maintain measurement accuracy.
Our laboratories are air-conditioned to 20°C. Temperature as such has a major influence on the accuracy of the measurements, so sufficient time for the parts to be tempered must be allowed before the actual measurement.
We also perform independent measurements in litigation between two subjects.


3D measuring machines are important tools for measuring the accuracy and geometric characteristics of components. These machines are used in industrial applications for quality control and verification of dimensions and geometric properties of various components.
Principles and methods on 3D measuring machines
The basic principle of 3D measurement is to obtain data about the geometric properties of objects. These machines use a variety of measurement methods, including optical sensors, touch probes and combinations of these technologies.
Optical sensors can measure distances and geometric characteristics of objects by projecting structured light onto the surface of the object. Contact probes allow direct measurement of geometric characteristics of objects by contact with the surface.
All of these measurement methods are linked to a computer system that processes and analyses the sensor data. This system allows us to measure objects in 3D space and obtain the results using 3D models.
The aim is to ensure measurement accuracy
During the measurement on the 3D measuring machine, we need to ensure that the object is clamped firmly so that there is no vibration. We ensure this need with anti-vibration bellows placed under the measuring machine. This is one of the conditions to ensure the accuracy of the measurement.
Results
The measurement results on a 3D measuring machine can be very accurate and can provide information on various geometric properties of the object, such as length and deviations in shape and position (flatness, straightness, circularity, coaxiality, parallelism, perpendicularity, runout, etc.) We need these properties for various applications such as manufacturing quality control, product design and development, prototype development, sampling and many more.
